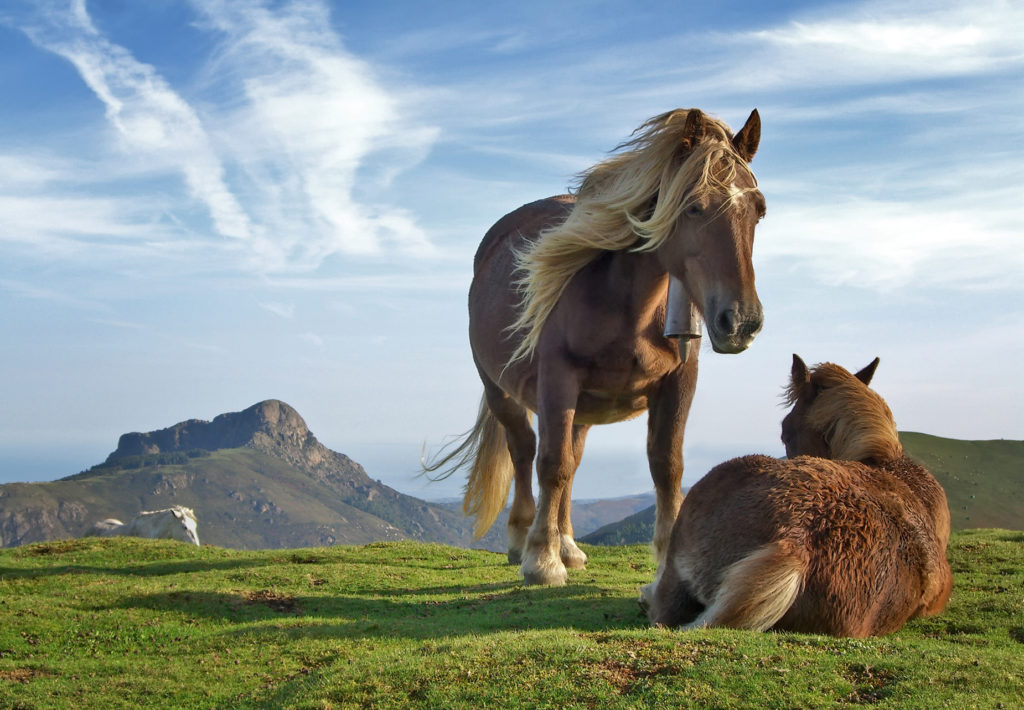
Author: MamatheFox

Clean Your Cat Litter Dust & Odors with Febreze Air Purifiers

I love my kitties!

MamatheFox has 2 cats and we love them so very much.

The only stinky part about being a cat owner is the litter box…the smell and the dust.

Then I found out about Febreze Air Purifiers and took a closer look at what they had to offer.


Febreze Air Purifiers have a powerful, replaceable dual-action filter that traps up to 99% of airborne particles such as dust, pollen, and pet dander while simultaneously releasing the fresh scent of Febreze! Equipped with three air-cleaning levels and a freshness dial for the scent cartridge, this air purifier can take on the smelliest of rooms while also eliminating those pesky dust bunnies.


I keep my litter box in a nice little “kitty poop house” as my children call it. It helps keep the litter that gets kicked around contained, but it does not hold back the smells or assist in the major dust issues.


Febreze® Air Purifiers are the only air purifiers specially designed to powerfully clean the air, eliminate odors and add freshening with Febreze scent. Breathe Cleaner Air, Breathe Happy!

  • Dual-action HEPA-type filter captures up to 99% of  airborne pollutants & allergens such as dust, smoke, pollen and pet hair & dander that passes through the filter
  • Manual controls with easy-grip knob
  • Three air cleaning levels
  • Electronic filter and scent replacement indicators
  • Includes 1 Linen & Sky™ scent cartridge
  • ENERGY STAR® qualified
  • Recommended for small rooms (85 sq. ft).
  • To ensure stated product performance, use only Genuine Febreze Filters


There are a few types of air purifiers Febreze has to offer – the one I am showing you is the smaller version – best for rooms 85 square feet or small – which is great for laundry rooms. This table top version is perfect for giving you that air purifying work but without taking up a huge space in your home or causing it to be an eyesore.


They have 2 types of filters is will need – the basic Febreze HEPA-Type Filter – this is what captures the icky things from the air. The other is the Febreze® Linen & Sky™ Air Purifier Scent Refill and the Febreze® Spring & Renewal™ Air Purifier Scent Refill – these help put a lovely Febreze scent in the air which blows back out of the purifier.


Where to Buy?

HSN, Walmart, Staples and more – click here for the list of vendors and links


HEX Performance Detergent Giveaway

Welcome to the Come What May Giveaway Hop


Hop hosted by: MamatheFox.com

Prize Sponsored by: Hex Performance Detergents


Enter for your chance to win (1) HEX Performance Advanced Detergent – Fresh Scent – Liquid  & (1) HEX Performance In-Rinse Fabric Booster


Read more about HEX and there full line here


MamatheFox and all participating blogs are not held responsible for sponsors who fail to fulfill their prize obligations.

5 Ways To Treat Mild Gum Disease

Image credit
Image credit

If you or someone you know suffers from gum disease, you may be wondering what the best treatment is. While prevention is key, many adults do experience gum disease at some stage, and there are times when prevention is too late. At that point in time, it’s always best to seek advice from a professional dentist, like this Dentist in Augusta Maine. Nothing compares to professional medical care.

Fortunately, treating mild gum disease is relatively easy and once treated, you can then continue preventing a reoccurrence with good oral hygiene and regular visits to a dentist in Robina. There are different kinds of dental options available to you when dealing with receding gums, for example something like pinhole gum surgery could help to fix the problem.

The Best Way to Treat Gum Disease

Below, we have put together some tips for treating mild gum disease, or gingivitis. This is the less severe form of gum disease that usually occurs due to a build-up of plaque. The most common symptoms of gingivitis include:

  • Inflamed, sore gums
  • Bleeding gums
  • Bad breath
  • Loose teeth
  • Receding gums
  1. Improve Your Oral Care Routine

There are two things to do in treating gingivitis:

  • Reduce and get rid of plaque build-up
  • Reduce and get rid of the bacteria that causes the plaque

Harmful bacteria combined with particles of food irritate the gums and result in gum disease. The first step is to remove bacteria and plaque by brushing for at least two minutes at a time, twice a day. Here you can find the Best Electric Toothbrush For Receding Gums, which will help to treat your gingivitis. You should also floss daily.

2. Remove Hidden Bacteria Below the Gum Line

Bacteria are tiny and can get caught in all kinds of inaccessible places. One particular area for concern is just below the gum line. Regular brushing can’t quite reach there and flowing only tackles between the teeth. That’s why you should use a specially designed brush that can reach below your gum line to get rid of the bacteria that lurks there.

3. Use a Mouthwash

When you experience a flare up of gingivitis, try introducing a natural or medicated mouthwash to your hygiene routine for a short period of time. A mild saline solution can also neutralise the bacteria and should be used for about a week.

4. Keep Brushing

Even if your gums are inflamed and bleeding, it’s still important to keep brushing. While it may be unpleasant at first, especially if your gums are bleeding, gums do have exceptional healing abilities and recover quickly once you get rid of the bacteria. Sensitivity also tends to end quickly, as does the inflammation. It can’t be stressed enough how important it is to visit your local dentist if inflammation continues. This could be a dentist Milltown.

5. Watch Your Eating Habits

If you do have gum disease, you should try to minimise how much acid and sugar you consume as these are things that bacteria thrive on and you will only exacerbate the problem. Snacking between meals is a big culprit, especially when you snack on fizzy drinks and sugary goodies.

Overall, the best treatment for gum disease is prevention. Once you have treated gum disease, you can get to work minimising the chance of it developing again with the following preventative measures:

  • Remembering to brush twice a day for two minutes at a time
  • Remembering to brush before going to bed
  • Daily flossing with interdentals used a few times a week
  • Minimising how much sugar and acid you consume
  • Regularly drinking water and rinsing to remove bacteria and food particles throughout the course of the day

If you are worried about gum disease or need help with your oral health, book an appointment with your dentist as soon as possible.

Boosting Self-Esteem Within Your Child

Image Credit


Self-esteem can easily be knocked, especially with children who are much more vulnerable to the knocks life throws their way. This is why it is highly important that when you see your child’s self-esteem has been damaged in some way, you take steps to top it up.


Self-worth is a massively valuable human asset that can promote confidence and later life success. This is why it’s crucial to find the root of the diminished self-worth and start rebuilding it instantly.


Firstly, you should ask whether your child’s learning or day care environment is helping or contributing to the self-esteem issues. It is best to look for a safe, up-building and encourage environment that adds to your young one’s self-esteem rather than takes from it. You can find amazing day care in Melbourne or in your local area where children are provided with the tools and atmosphere they need to build great self-esteem.


For now, however, if your child is having issues, we have some great tips that you can put into action straight away.


TOP TIPS FOR REBUILDING YOUR CHILD’S LOST SELF-ESTEEM


First, it’s important to notice the signs of low self-esteem as young children may not know how to communicate they feel this way. Kids who have a good sense of self-worth normally:


  • Feel accepted by others and in the world
  • Have confidence and can rise to small challenges set before them
  • Feel good and pleased when they accomplish something
  • Have positive and good thoughts about themselves


If your little one struggles with self-esteem, they may emit the following qualities and behaviours:


  • Easily criticise themselves
  • They won’t acknowledge their successes and be really hard on themselves
  • Suffer with insecurity, especially around others
  • Have low confidence in themselves


How To Nurture Self-Esteem


Self-esteem isn’t helped by telling your child how great and amazing they are. Instead, they need to experience their capabilities and excellence on their own accord. Here are some things you can do to nurture self-esteem:


  1. Give your child new learning experiences – Whenever you can, give your child a chance to learn something new and rise to the challenge. Every time they do, it builds self-esteem.
  2. Help them out- Provide a helping hand to start them off when learning. Don’t hinder them for mistakes or make anything too easy/hard.
  3. Give your child the right kind of praise – You don’t want to build up their egos too much but praise is normally healthy for kids. Great ways to praise is to look at effort over qualities, steer clear of going over the top and focusing on the strengths of the child.


Doing the above can make a world of difference to a child’s self-worth and value. Value starts at home and the more you can create an environment where it’s nurtured, the more your child’s self-confidence will flourish.

All You Need To Know About The Different Types Of Hair Extensions

Almost all people have felt envy over a celebrity and their luscious locks, cursing genetics for not blessing you with a beautiful mane. Do you remember Beyonce when she flips her hair from one side to another? Delightful, isn’t it? Well, what if we were to tell you that the glorious mop of hair is potentially not her own.

No mean to disrespect the Queen, but the majority of Hollywood’s leading ladies receive some help in this department including Beyonce. So, instead of sitting back and waiting for your hair to grow to those lengths, why not cheat your way to great lengths similar to the A-list divas? You could easily get something like these clip in hair extensions to give you a similar look that Beyonce has if you wanted. This way you don’t have to wait to grow your hair.

What Is The Lowdown On Hair Extensions?

Firstly, all types of Russian hair extension require correct maintenance and care; therefore, it is essential that you understand what you are buying before you buy it. There are various types of textures, hues, and extension application methods meaning that you need to do some research before taking the plunge. Furthermore, hair extensions are expensive investments and can cost in the range of $500 or more – and this is only the beginning of the process! Be sure to do some homework, compare extensions, and speak to hair experts to find the best priced hair extensions denver available.

What Type Of Hair Extensions Should You Choose?

If you have not used hair extensions before, you may be feeling somewhat overwhelmed at the moment. Do not fret – we are here to help you through the procedure. For example, choosing hair extensions for straight 180-strangs are not necessarily the most suitable for a person with wavy hair; therefore, it is important that you explore the options available. While a tape-in and fusion extension can work with all hair textures, weaves are considered the best suited alternative to individuals with curly hair.

  1. The Clip In

The most popular temporary form of hair extension is the clip in extension. This type of extension can be applied and removed within a few minutes.

The benefits of a clip in extension are that they are reasonably cheap to purchase and are not permanent, so you can remove the item when you do not wish to use them any longer. Moreover, there is no need to visit a salon to apply a clip in extension as they can be applied at home without any damage to the hair.

Unfortunately, there are drawbacks to clip in extensions and this is primarily that the extension is made from low-quality hair. The cheap materials contribute to a synthetic appearance making them look like extensions and not natural hair. Clip ins have a tendency to fall out if not applied correctly, and since clips can be chunky they are difficult to wear with an up hairstyle.

  1. The Weave Option

Weaves involved braiding natural hair into cornrows and then sewing the extensions into the cornrows using cotton and a needle. This option is ideal for females with medium to thick curly hair.

One of the greatest benefits of weaving is that it ensures the hair extension remains in place, as well as looking relatively natural. Extensions as part of a weave are available in a plethora of colors, lengths, and hair types making them suitable for females with curly and wavy hair.

The drawbacks of this type of hair extension is that the extension is typically created using low-quality human hair or artificial hair. Furthermore, if the braid from the cornrow is too tight, it can place a strain on the individual’s scalp causing the hair to fall-out or scab. If the weft of the extension is too heavy, ladies with thin hair may suffer because the weight can pull hair out. Although, you could always try the hair products from luxuriouslook.co.uk, with their Clinical Densifying shampoos.

  1. The Pre-Bonded Option

Pre-bonded hair extensions, also known as a fusion hair extension option, involves bonding natural hair to extensions using adhesive.

The positive aspects of the pre-bonded option is that they are easy to maintain, are highly discreet, and can be cared for in the same way as one’s natural hair. This method is mostly permanent, made with high-quality human hair, and depending on natural hair growth can last for approximately six months or more.

Drawbacks of the pre-bonded hair extension option include a long application process that can last in excess of four hours for suitable application. It can also be a painful application as the hair extension is placed close to the scalp, and if it is too tight the extension will pull on the natural hair resulting in damage. Certain pre-bonded extensions utilize polymers or glue adhesives that are petroleum-based, which can result in hair thinning when used over a long period.

  1. The Tape Option

To hold hair extensions in position, a double-sided tape option is applied between two sections of the natural hair. This type of extension is easy, painless, and quick to apply; furthermore, the tape hair extension lies comfortably and flat in the hair without causing any damage to the natural hair strands.

As is mentioned, the tape hair extension is easy to apply and it is simple to remove when required. A semi-permanent option, the extensions are easy to maintain and can be styled as per normal; furthermore, the extensions will last approximately twelve weeks depending on natural hair growth.

Unfortunately, there are drawbacks including the fact that tap extensions are typically created using synthetic hair or low-quality human hair. The extensions have less mobility than natural options and they do not have clear adhesive strips, so there is the chance that the extension application will be seen through the natural hair.

  1. The Micro-Link Option

The micro-link option, similar to these from Airyhair.com, involve a procedure where hair extensions are looped through natural hair and then clamped using pliers and metal beads.

This is a beneficial option as it can be easily moved up along the hair shaft making it a cost-effective alternative. It is relatively painless and can last for approximately one year.

The drawbacks of a micro-link extension include the extensions tendency to slip down the natural shaft and receiving attention. Moreover, the metal links can cause damage to natural hair strands, and when heat is applied to the hair the metal can cause breaking to the natural strands. The extensions are also made from low-quality hair that will require trimming.

Chill Out with Arctic Zero Light Ice Cream

I love this heat wave we are finally getting!

The Midwest needs some sunshine, and nothing goes better with the sunshine then ice cream!


We are true ice cream fanatics in the Fox household.  We have tried so many brands and flavors it would amazing you. Each of the members of my family have their top favorite flavors and combos.


My son loves vanilla – nothing but plain vanilla for that little boy

My daughter loves chocolate and mint chocolate chip

My husband loves peanut butter and ice cream with crunchy bits mixed in

This Mama loves the sweet and salty flavors like caramels and toffee


Whatever flavor you love best Arctic Zero, the new light ice cream now available in stores, will have one that will make your mouth water.


The most popular ice creams on the market now are the “light” and “low calorie” options. I am loving this craze! I have a problem with self control and proportions with it comes to sweet treats with ice cream. With the containers conveniently packaged with a low calorie total – clearly stated on the carton – I am way better able to gauge how much I can splurge on.


There are a lot of light ice creams on the market now – so what makes Arctic Zero different?


The new pints are packed with rich flavor and a creamy texture from real milk, cream and cane sugar.

Arctic Zero is made with clean ingredients.

No Sugar Alcohols

Non-GMO Verified

rBST Free


Connect with Arctic Zero

Facebook                     Twitter                     Instagram                    Pinterest


Now Available at Select:

Fresh Thyme, Giant, Giant Eagle, Jewel, Martin’s, Russ’s, Safeway, ShopRite, Stop & Shop, Super Saver & Woodman’s stores.

* Arctic Zero light ice cream flavors contain between 64%-74% fewer calories and 84%-94% less fat than similar flavors of full-fat ice cream.


Have more questions about Arctic Zero – click here for FAQ’s

Seas the Day Giveaway Hop


Theme – Open
Minimum prize value of $10. Must be a new item.
Date: 7/1 – 7/15
Start time: July 1 – 9:00 am EST
End time: July 15 – 11:59 pm EST
Winner(s) must be drawn on 7/16. Events must be open to US entrants.

Adding your link means you agree to the following terms:
Your post must include the following:

The full HTML which will be provided by email.
A clear form of entry (a giveaway form or a blog comment)
The giveaway hops image (in HTML and also included by attachment to the email)
The linky must be included in your post (code will be sent in email)
Your giveaway item(s) have a value of $10.
Must include disclosure included in email
A Link to the hosts: MamatheFox (https://mamathefox.com) 

This giveaway must be dedicated to this event only

If you sign up and can no longer participate please let me know so I can remove you from the linky.


  Please retweet to share the hop with more people


Seas the Day Giveaway Hop

Make A Splash Giveaway Hop


Theme – Open
Minimum prize value of $10. Must be a new item.
Date: 6/16 -6/30
Start time: June 16 – 9:00 am EST
End time: June 30  – 11:59 pm EST
Winner(s) must be drawn on 7/1. Events must be open to US entrants.

Adding your link means you agree to the following terms:
Your post must include the following:

The full HTML which will be provided by email.
A clear form of entry (a giveaway form or a blog comment)
The giveaway hops image (in HTML and also included by attachment to the email)
The linky must be included in your post (code will be sent in email)
Your giveaway item(s) have a value of $10.
Must include disclosure included in email
A Link to the hosts: MamatheFox (https://mamathefox.com) 

This giveaway must be dedicated to this event only

If you sign up and can no longer participate please let me know so I can remove you from the linky.


  Please retweet to share the hop with more people


How To Find A Good Teen Therapist


When looking for a therapist to help your teen deal with any problems he or she is experiencing, it is important that you choose one who is skilled. However, looking for a good therapist can be a daunting task as there are many therapists who work with teens. Finding a good therapist to help your teen can be easy if you know what to consider and which questions to ask when looking for a therapist.


What to consider when looking for a therapist


Experience and expertise

A therapist with expertise and experience can help your teen in the best way possible. Keep in mind that teens are not a junior version of adults and the problems they experience have to be dealt in a unique way as they are unique to their age group.


If possible, ask for a recommendation from a person with personal knowledge of a certain therapist%u2019s skills and personality. This will make it easy for you to find an experienced and knowledgeable therapist to help your teen.


License

It is always a good idea to look for licensed teen therapists as this indicates that the therapist is licensed to practice psychotherapy. Insurance policies only cover services provided by a licensed mental health professional. Therefore, choosing a therapist who is not licensed means that your sessions will not be covered by your insurance policy.


However, you should remember that there are exceptions when it comes to licensing such as a trained religious and drug counselor. You can find such important information about the different teen therapists found in your area by searching on the internet.


Visit the websites of the different therapists found in the place where you live to know about the details of practice of different therapists and how they work with teens.


The training and approach of the therapist

Since there are different ways to treat teens, it is good to familiarize yourself with the different approaches of therapy. Familiarizing yourself with these approaches will help you choose an approach that can be ideal for your teen. You should base your choice on the issues your teen is struggling with and the background that makes that seems sensible to you.


The qualities your teen needs in a therapist

Think about the specific qualities your teen needs in a therapist. Is your teen likely to respond best to a therapist who is direct and to the point? Or does he or she respond to a therapist who is more supportive and nurturing? Does he or she prefer a therapist of a certain gender? Does he or she consider the age of the therapist? Does he or she prefer someone who is young and energetic or does he or she like an experienced therapist?


Questions to ask a potential therapist

You can interview potential therapists over the phone, by email or in a face to face meeting. Some of the therapists often conduct an initial consultation at a reduced cost to enable you to meet them and ask them questions regarding their practice. Here are questions to ask a potential therapist to determine whether or not he or she will be best placed to work with your teen:


  • Have you ever dealt with a problem such as the one my teen is struggling with? And if so what is your experience?
  • How many years have you been in practice?
  • How will you work with my teen?
  • Would you like other family members to be involved in the therapy process?
  • Are you licensed? And if so, is it updated?
  • How do you create goals therapy goals and measure the progress of these goals?
  • Which therapy approach do you use?
  • Are you a member of any professional organization?


Once the therapist has answered the questions above, consider how they have described their approach and their personality. Does the therapist know what they are talking about? Does the therapist have genuine empathy for teens? Is he or she patient in answering questions? Do you feel comfortable around them?


What is the most important factor when looking for a therapist?

While experience and credentials are important factors to consider, the personality of a therapist and the therapeutic rapport that develops between the therapist and your teen is the most important factor.


This relationship is often the most important factor as it determines whether or not the therapist will succeed in providing help to a troubled teen. They are already quite closed off at that age, so it would be important to find someone who can break that shell and help offer different Coping skills for teens with mental health issues. When looking for a therapist, choose one who will be able to bond with your teen. And remember to pay attention to your gut feeling when looking for a therapist.


Other things to consider when looking for a therapist

Ideally, your teen should be part of this process even if you are the one insisting they take part in therapy. In most cases, it is good for parents to get referrals and do the initial screening and then provide this information to their teens and let them make the final decision.


If the relationship doesn’t seem to be coming together after a few sessions, it may be good to look for another therapist or ask the therapist to refer you to someone he or she thinks will be a better fit.


The Dos And Don’ts Of At Home Gel Nails


If you go to the nail bar often you know the price of gel nails. However, it’s possible to do the same job at home if you know what you’re doing. These Future in Beauty online courses can teach you a thing or two if you’re interested in learning from the professionals, but you can get started here. Here are the do’s and don’ts of home gel nails.


Do Your Research


You should never hesitate to do some research via the internet because virtually all knowledge will be at your fingertips. Of course, you should always use official and reliable resources for tips, tutorials, and tricks. Watching a few videos on basic gel nail application is important and many brands will have these available. You should also look at your favorite nail blog for any tips that they have gained from experience. When you research, you should also create your own notes. This will help you ensure that your gel manicure lasts.


Complete Proper Nail Preparation


Gel polish requires a clean and dry surface to adhere to if you want it to last. To do this, you should start with pushing back your cuticle. File your nail to the desired shape and you can learn how to do this when doing your research. When you prepare your nails, you need to ensure that the little hangers from the edge and underneath the nail because this will leave rough edges that cause issues.


You should then lightly buff the surface and edge of your nails with an extra-fine buffer. You have to then spray cleansing alcohol on the nail and wipe it off with a lint-free wipe. You should also use a pH balancing liquid or primer on the nail before you start the application process. You can also look at using pure acetone before the primer to ensure that there is no moisture present when you start the application. If you have nail issues, then gel nails may not be the best possible solution and you should perhaps use a suitable nail polish – we have heard good things about drs remedy nail polish


Prepare Your Supplies Before You Begin


You need to make sure that everything you need is within reach before you actually start. Once you begin the application process, you will not want to touch anything unnecessary as this could leave you open to debris and lint sticking to the unfinished manicure. There are a few items that you have to get ready before you start your gel nails including:


Plugging in the gel lamp


All the gel polishes you are going to use including the primer, base, and top coat


The acetone


Lint-free wipes


Cleansing alcohol


Paper towels in case something goes wrong


A clean-up brush


Use Proper Removal Techniques


If you want to maintain the health of your nails, this is a very important thing to do. While the acetone will dehydrate your nail plate, properly soaking off the gel polish will prevent it peeling off your nails. You should use a file to break the surface of the gel polish. You should then saturate lint-free wipes with pure acetone, wrap them in foil and leave them for 10 to 15 minutes. Using an orange stick, you will need to gently lift the remaining gel from the nail. If some of the gel remains, you will need to reply the acetone-soaked wipes to the nail and foil for a few more minutes.


Do Not Apply Thick Layers


When applying gel polish, you need to avoid thick layers. Thin layers of the polish will make the application smoother. Additionally, with gel polish, when the foundation and top coat are too thick, the curing and adherence can be negatively affected.


If you think that you have applied too much of the polish, you need to use a dry-brush technique. This is where you wipe the excess product off with the brush and drag is back over the already polished nail. Once the polish has cured, you will need to repeat this once to twice for a total of 2 to 3 layers of polish.


Do Not Wash Your Hands


While this might seem strange, you should avoid washing your hands before product application. The fact that it is better to have super-dry nail plates is the reason behind this. If you wash your hands, all the dehydrating which was done will be reversed. If you have to wash your hands right after polish removal, you need to dry them thoroughly and proceed with prepping your nails.


Do Not Let The Gel Touch The Skin


This will take a bit of practice and the right tools, but it is vital if you want your manicure to last. Gel polish does not like skin and will start to lift if any is left on the skin to cure. Additionally, the errant polish which is left to cure will also make the sides of your manicure uneven and jagged which can catch and lift. Before each layer cures, you should use an angled brush which has been dipped in acetone to clean along the side of the nail and the cuticle.


Do Not Pick


This is the worst thing that you can do with any nails or manicure. There is a lot of temptation to do this, but picking is actually the most damaging action that you can take. This is also the reason why gel polish has earned a reputation for damaged the nail plate. The high adhesion that is offered by these products means that when the polish lifts, some layers of the nail come with it. This will leave uneven, thin and flaking nails, so remember to not pick at them.